Introduction#
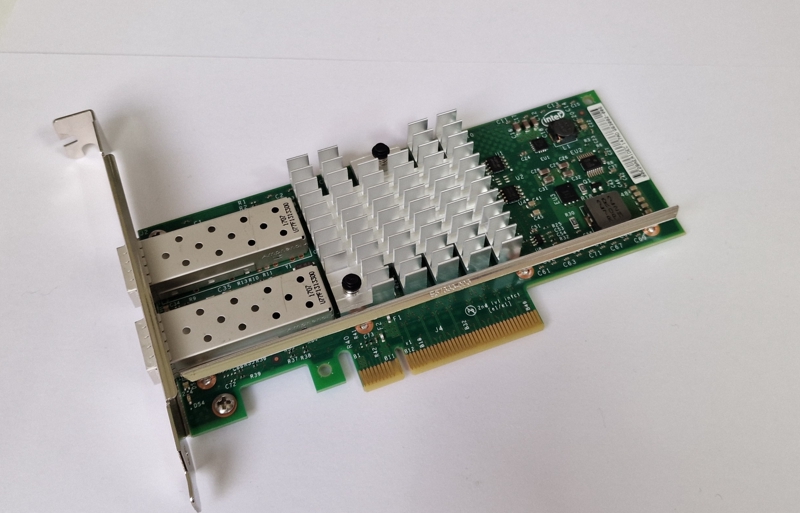
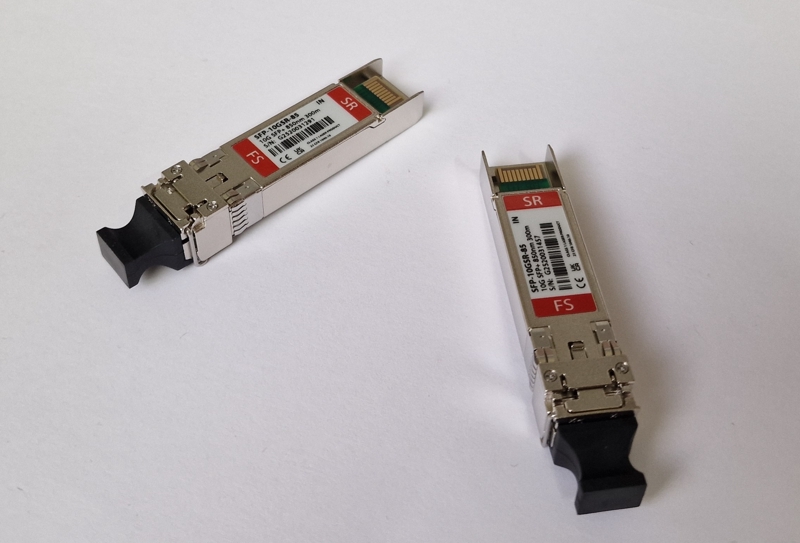
I always wanted to experiment with Ethernet speeds above the standard 1 Gigabit maximum. Recently I bought myself a Intel X520-DA2 Network Interface Card (NIC) together with four 10G SFP+ modules and four LC UPC OM4 fiber cables from FS. The reason I bought myself this NIC is because I want to develop my own NIC based on my own FPGA design complient with the the 10GBASE-R IEEE 802.3 standard standard. I need a functioning and compliant device to be able to test the Device Under Test (DUT), which is my FPGA. Another reason for the purchase is that I want to play around with fiber optics and networking. 😀
Mounting#
While I was mounting the NIC I was doubting if it was going to work since I only got PCIe x16 slots available while the NIC is PCIe x8. After a small research it seems it is perfectly usable in a x8 configuration.
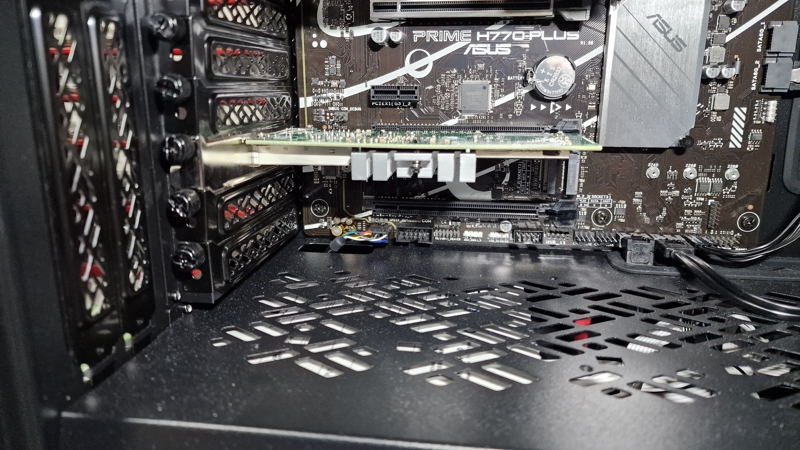
Now reboot and let’s see if the NIC shows up.
The card showed up sucessfully as two PCIe interfaces.
$ lspci -v
05:00.0 Ethernet controller: Intel Corporation 82599ES 10-Gigabit SFI/SFP+ Network Connection (rev 01)
	Subsystem: Intel Corporation Ethernet Server Adapter X520-2
	Flags: bus master, fast devsel, latency 0, IRQ 16, IOMMU group 16
	Memory at 85f00000 (64-bit, non-prefetchable) [size=1M]
	I/O ports at 4020 [size=32]
	Memory at 86104000 (64-bit, non-prefetchable) [size=16K]
	Expansion ROM at 86080000 [disabled] [size=512K]
	Capabilities: <access denied>
	Kernel driver in use: ixgbe
	Kernel modules: ixgbe

05:00.1 Ethernet controller: Intel Corporation 82599ES 10-Gigabit SFI/SFP+ Network Connection (rev 01)
	Subsystem: Intel Corporation Ethernet Server Adapter X520-2
	Flags: bus master, fast devsel, latency 0, IRQ 17, IOMMU group 17
	Memory at 85e00000 (64-bit, non-prefetchable) [size=1M]
	I/O ports at 4000 [size=32]
	Memory at 86100000 (64-bit, non-prefetchable) [size=16K]
	Expansion ROM at 86000000 [disabled] [size=512K]
	Capabilities: <access denied>
	Kernel driver in use: ixgbe
	Kernel modules: ixgbe
Changing interface names#
I don’t like the default naming scheme of the network interfaces, so I customized the naming per interface.
The current naming scheme is as follows:
$ ifconfig -a
... stripped some data off
enp5s0f0: flags=4098<BROADCAST,MULTICAST>  mtu 1500
        ether <MAC>  txqueuelen 1000  (Ethernet)
        RX packets 0  bytes 0 (0.0 B)
        RX errors 0  dropped 0  overruns 0  frame 0
        TX packets 0  bytes 0 (0.0 B)
        TX errors 0  dropped 0 overruns 0  carrier 0  collisions 0
enp5s0f1: flags=4098<BROADCAST,MULTICAST>  mtu 1500
        ether <MAC>  txqueuelen 1000  (Ethernet)
        RX packets 0  bytes 0 (0.0 B)
        RX errors 0  dropped 0  overruns 0  frame 0
        TX packets 0  bytes 0 (0.0 B)
        TX errors 0  dropped 0 overruns 0  carrier 0  collisions 0
To change the configuration let’s create systemd’s .link files.
sudo nano /etc/systemd/network/10-xge0.linkThe default naming’s priority is ‘99’.
The config:
[Match]
MACAddress=<MAC ADDRESS>

[Link]
Name=<DESIRED IF NAME>
After the reboot we see:
$ ifconfig -a
... stripped some data off
xge0: flags=4098<BROADCAST,MULTICAST>  mtu 1500
        ether <MAC> txqueuelen 1000  (Ethernet)
        RX packets 0  bytes 0 (0.0 B)
        RX errors 0  dropped 0  overruns 0  frame 0
        TX packets 0  bytes 0 (0.0 B)
        TX errors 0  dropped 0 overruns 0  carrier 0  collisions 0

xge1: flags=4098<BROADCAST,MULTICAST>  mtu 1500
        ether <MAC>  txqueuelen 1000  (Ethernet)
        RX packets 0  bytes 0 (0.0 B)
        RX errors 0  dropped 0  overruns 0  frame 0
        TX packets 0  bytes 0 (0.0 B)
        TX errors 0  dropped 0 overruns 0  carrier 0  collisions 0
Bring interfaces up#
Before the interfaces can be brought up, the transceivers and fiber cables need to be inserted into the NIC.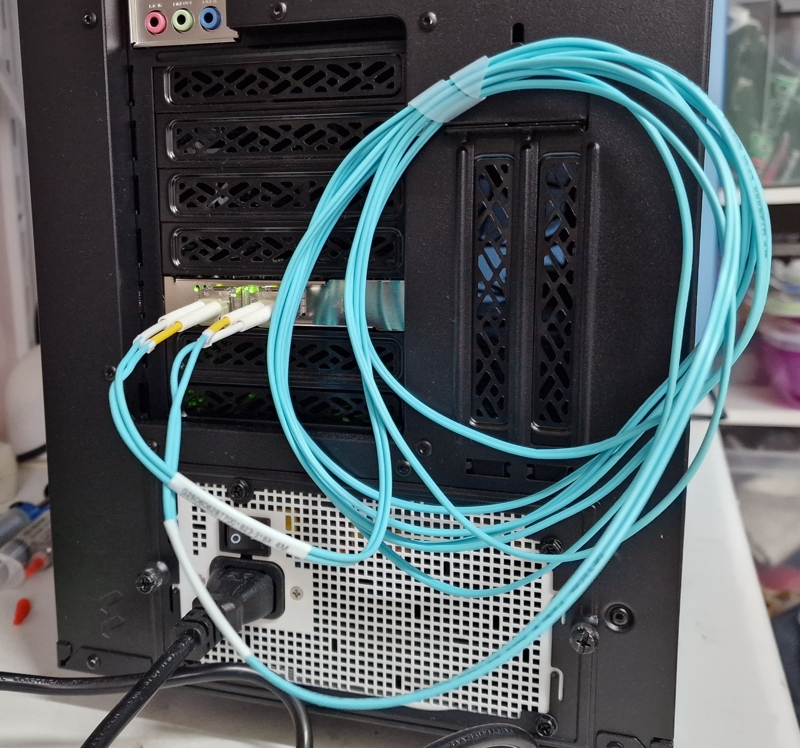
Oh also fun fact, you can click the fiber’s and transceiver’s dust caps into another such that both are kept clean.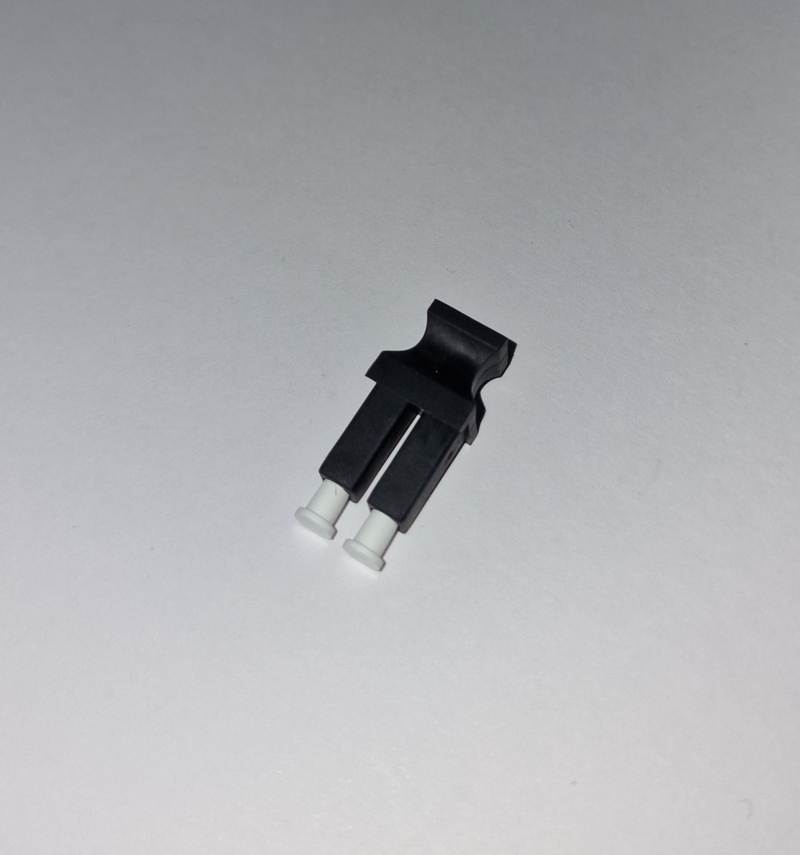
Now that the NIC is “wired”, the interfaces can be brought up and tested.
sudo ifconfig xge0 192.168.10.2 up
sudo ifconfig xge1 192.168.11.2 up
And there it is, both lights lit up succesfully meaning we have a 10G link!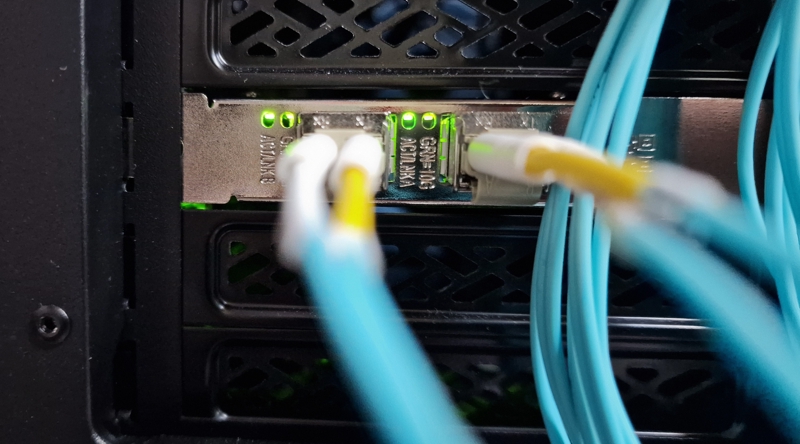
Performance testing#
Because I am curious about the performance, I executed an iperf3 test between the two interfaces to get a real result. At first I thought it was as simple to just run iperf with a server and a client and that’s it.
$ iperf3 -s                     # Termninal 1 - Server
$ iperf3 -c 192.168.10.2        # Termninal 2 - Client
iperf3 -c 192.168.10.2
Connecting to host 192.168.10.2, port 5201
[  5] local 192.168.10.2 port 51638 connected to 192.168.10.2 port 5201
[ ID] Interval           Transfer     Bitrate         Retr  Cwnd
[  5]   0.00-1.00   sec  9.42 GBytes  80.8 Gbits/sec    0   1.75 MBytes
[  5]   1.00-2.00   sec  9.51 GBytes  81.7 Gbits/sec    0   1.75 MBytes
[  5]   2.00-3.00   sec  9.17 GBytes  78.8 Gbits/sec    0   1.75 MBytes
.......
[  5]   7.00-8.00   sec  8.90 GBytes  76.5 Gbits/sec    0   2.69 MBytes
[  5]   8.00-9.00   sec  6.80 GBytes  58.3 Gbits/sec   14   2.69 MBytes
[  5]   9.00-10.00  sec  8.91 GBytes  76.5 Gbits/sec    0   2.69 MBytes
- - - - - - - - - - - - - - - - - - - - - - - - -
[ ID] Interval           Transfer     Bitrate         Retr
[  5]   0.00-10.00  sec  94.7 GBytes  81.4 Gbits/sec   16             sender
[  5]   0.00-10.00  sec  94.7 GBytes  81.4 Gbits/sec                  receiver

iperf Done
Well…
As you can see the bitrate completely overflows the realistic bitrate of my 10GbE NIC which means the network stack is smart enough to route the traffic via the kernel…
To solve this I had to put one interface in a different network namespace (ns).
Prior to this I was not familliar with network namespaces and had to learn the meaning of it.
As my understanding, a namespace is virtual isolated copy of the Linux networking stack on the same host machine.
A seperate network namespace has it’s own:
- Network interfaces
- IP addresses
- Routing tables
- Firewall rules
The reason why this solves the internal routing problem is that it now looks like two sepperate ports on seperate machines.
A nice article about Linux network namespace can be found here.
Fun fact: Docker leverages network namespaces to provide isolation/network stacks on a container level.
The following commands were exectuted to prepare the interfaces:
# Create namespace
sudo ip netns add test

# Move xge1 to namespace
sudo ip link set xge1 netns test

# Configure xge1 in namespace
sudo ip netns exec test ip addr add 192.168.11.2/24 dev xge1
sudo ip netns exec test ip link set xge1 up
sudo ip netns exec test ip link set lo up
sudo ip netns exec test ip route add 192.168.10.0/24 dev xge1

# Configure xge0 in default namespace
sudo ip addr add 192.168.10.2/24 dev xge0
sudo ip link set xge0 up

# Add route to force traffic via xge0
sudo ip route add 192.168.11.0/24 dev xge0
Run iperf3 test again:
$ sudo ip netns exec test iperf3 -s -4  # Terminal 1 - Server
$ iperf3 -c 192.168.11.2 -4 -t 30       # Terminal 2 - Client
Connecting to host 192.168.11.2, port 5201
[  5] local 192.168.10.2 port 33072 connected to 192.168.11.2 port 5201
[ ID] Interval           Transfer     Bitrate         Retr  Cwnd
[  5]   0.00-1.00   sec  1.10 GBytes  9.43 Gbits/sec  285   1.23 MBytes
[  5]   1.00-2.00   sec  1.10 GBytes  9.42 Gbits/sec   12   1.38 MBytes
[  5]   2.00-3.00   sec  1.10 GBytes  9.42 Gbits/sec    0   1.38 MBytes
[  5]   3.00-4.00   sec  1.10 GBytes  9.42 Gbits/sec    0   1.39 MBytes
[  5]   4.00-5.00   sec  1.09 GBytes  9.40 Gbits/sec    0   1.39 MBytes
.......
[  5]  25.00-26.00  sec  1.10 GBytes  9.42 Gbits/sec    0   1.43 MBytes
[  5]  26.00-27.00  sec  1.09 GBytes  9.41 Gbits/sec    0   1.43 MBytes
[  5]  27.00-28.00  sec  1.10 GBytes  9.42 Gbits/sec    1   1.43 MBytes
[  5]  28.00-29.00  sec  1.10 GBytes  9.41 Gbits/sec    0   1.43 MBytes
[  5]  29.00-30.00  sec  1.10 GBytes  9.42 Gbits/sec    0   1.43 MBytes
- - - - - - - - - - - - - - - - - - - - - - - - -
[ ID] Interval           Transfer     Bitrate         Retr
[  5]   0.00-30.00  sec  32.9 GBytes  9.42 Gbits/sec  325             sender
[  5]   0.00-30.00  sec  32.9 GBytes  9.41 Gbits/sec                  receiver

iperf Done.
Well this is what we are looking for!
A nice stable bitrate of ~9.4Gbit per second.
Jumbo framing#
I have heard a couple of times of jumbo framing and I want to see if this can improve the bitrate. Jumbo framing is setting the Maximum Transmission Unit (MTU) to 9000 which creates the possibility to pack more data in a Ethernet payload frame. This is often done in specialized environments such as datacenters to improve the network performance. Note that jumbo framing can also backfire, one example all devices on the network need to support jumbo frames.
$ sudo ip link set xge0 mtu 9000
$ sudo ip netns exec test ip link set xge1 mtu 9000
iperf3 test:
$ sudo ip netns exec test iperf3 -s -4  # Terminal 1 - Server
$ iperf3 -c 192.168.11.2 -4 -t 30       # Terminal 2 - Client
Connecting to host 192.168.11.2, port 5201
[  5] local 192.168.10.2 port 38658 connected to 192.168.11.2 port 5201
[ ID] Interval           Transfer     Bitrate         Retr  Cwnd
[  5]   0.00-1.00   sec  1.15 GBytes  9.87 Gbits/sec   35   1.54 MBytes
[  5]   1.00-2.00   sec  1.15 GBytes  9.91 Gbits/sec    2   1.54 MBytes
[  5]   2.00-3.00   sec  1.15 GBytes  9.89 Gbits/sec    2   1.54 MBytes
.......
[  5]  26.00-27.00  sec  1.15 GBytes  9.90 Gbits/sec    0   3.04 MBytes
[  5]  27.00-28.00  sec  1.15 GBytes  9.90 Gbits/sec    0   3.04 MBytes
[  5]  28.00-29.00  sec  1.15 GBytes  9.90 Gbits/sec    0   3.04 MBytes
[  5]  29.00-30.00  sec  1.15 GBytes  9.89 Gbits/sec    0   3.04 MBytes
- - - - - - - - - - - - - - - - - - - - - - - - -
[ ID] Interval           Transfer     Bitrate         Retr
[  5]   0.00-30.00  sec  34.6 GBytes  9.90 Gbits/sec   40             sender
[  5]   0.00-30.00  sec  34.6 GBytes  9.90 Gbits/sec                  receiver

iperf Done. We are now able to transmit and transceive at a stable bitrate of ~9.9Gbit per second!
Conclusion#
I had a great time exploring 10 Gigabit Ethernet, unexpectedly I learned a lot of new stuff and can be usefull in the future. For now the NIC is not really useful since my whole home network is still at 1Gbit twisted pair, but it will be used in the development of my own custom NIC.
Key takeaways:
- Network namespaces can be used to isolated and create new Linux network stacks
- Jumbo framing can actually improve throughput by a significant factor